

Terug naar blog
workflowtutorialimplementation
How a Product Configurator Gets Built (2026 Workflow)
Simplio3D·
Most product configurator projects fail in the same place: not in the 3D, and not in the code, but in the two weeks before either of those starts, when nobody has agreed what the configurator is actually for.
We have been building these since well before the platform existed, and the pattern is consistent. Teams that define the requirement precisely ship something useful in weeks. Teams that start from "we need a 3D configurator" spend a quarter discovering what they meant.
This is how the work actually goes now — the decisions in order, and what each one commits you to.
Configurators vary enormously in complexity — from something you could genuinely do in a spreadsheet to systems with hundreds of interdependent rules, ERP integration and a full management layer. The cost difference between those is not marginal, so this is the decision that matters most.
Six questions settle it:
Answer those and the shape of the configurator is largely determined. Skip them and you will answer them anyway, later, at greater cost.
In Simplio3D this is a real decision — the type is fixed once a project is created.
| Project type | What it does | Choose it when | Plans |
|---|---|---|---|
| Viewer | Presents a 3D model with no configuration options — rotate, zoom, animations, annotations | The product is fixed and you want people to inspect it properly | All plans |
| Configurator | Options for colours, materials, part visibility and dimensions, with conditional logic, pricing and quote forms | Customers choose from a defined option set and the price depends on what they choose | Starter and above |
| Modular | Drag-and-drop assembly where users combine 3D modules, with snap points, rotation, mirroring and undo | The customer designs a layout rather than picking from options — storage runs, modular seating, building systems | Enterprise |
Once the requirement and project type are settled, this part is largely mechanical.
Parts separated and named for the options you plan to build, UVs mapped square on any zone that will take uploaded artwork or text, polygons reduced, model centred, exported as GLB or GLTF. This is usually the longest lead item in the whole project.
PBR materials from your own texture maps, or library recipes for metals, woods, fabrics, glass and plastics. Materials can be bulk-added to a configurator by category, so a full finish range becomes a swatch set rather than dozens of hand-built options.
Sixteen option block types cover the ways customers interact: material and colour selection, part visibility, number inputs that scale the model, dropdowns, thumbnails, carousels, toggles, hotspots, scenery, text input, image upload, the Pattern Designer and the Design Canvas.
Conditional logic shows, hides and restricts options based on earlier selections. This is where the domain knowledge lives, and where most of the value is — a configurator that produces unbuildable configurations is worse than no configurator.
A base price, price groups tied to option blocks, price tables for two-dimensional combinations, and variables, combined in a visual token-based formula editor — for example [Base Price] + [Material Upgrade] × [Quantity]. Currency, decimals, tax rate and tax label are all configurable.
A quote form for made-to-order products, with submissions collected under Requests; or a cart integration for direct sale, through WooCommerce add-to-basket or Shopify Draft Orders and SKU-matched carts.
Enable the share link, take the iframe snippet, and place it on your product page. Restrict the domains permitted to embed it, and add a password if it is not ready to be public.
This is the part of the process that has genuinely changed, and it is worth being precise about what is now automated and what is not.
Simplio3D can generate a working configurator from a product description. That does not remove the need for a good model or for domain knowledge about your rules, but it does replace the blank-project problem: you get a structure to correct rather than one to invent.
The AI assistant can audit an existing configurator, reviewing option coverage and conditional logic. On a project with a few dozen options, exhaustive manual checking is tedious; past a few hundred, nobody does it, which is exactly when rule gaps reach production.
AI workflows manage multi-step jobs from the dashboard, for work that spans more than a single operation.
The MCP server exposes Simplio3D to AI assistants such as Claude, Claude Code, Cursor and VS Code, over OAuth 2.1 or scoped bearer tokens. It provides 115 tools — 51 read-only and 61 controlled-write — spanning projects, validation, 3D inspection, materials, option blocks, conditional logic, pricing, quotes, forms and sharing.
The read-only half is the useful starting point: an agent can inspect real projects, audit configurators, introspect models, evaluate conditional logic and calculate pricing without being able to change anything. Writes follow a propose, confirm and snapshot model, with rate limits, per-reply tool budgets and result size caps, and access is gated by plan and workspace role.
What has not changed: someone still has to know which combinations your factory can build. That knowledge is the configurator.
In the early days, configurators were built from scratch, which made them expensive and slow. That is precisely why the platform exists — with the common elements already built, a project only has to solve the part that is specific to your product.
Cost still tracks complexity, but the important point is that you do not need every feature at once. Implementing in stages lets you see how customers actually respond before deciding what is worth adding. That controls spend and, more usefully, means the second phase is informed by evidence rather than assumption.
A sensible sequence for most businesses:
There is a 30-day Pro trial, which is generally enough to build a real configurator for one product and find out whether the approach fits your catalogue.
The 3D model is usually the longest lead item. Once it is prepared, a straightforward single-product configurator with options, logic and pricing can be assembled quickly, because none of it requires development work.
Not for a standard build. Models, materials, options, logic, pricing and publishing are all handled visually. Developers become useful for ERP or CRM integration through the REST API and SDK, or for a fully custom UI.
It depends on the product. Appearance-led products need 3D. Layout problems are sometimes clearer in 2D — the Wise Company deck designer is a case where 2D was the right answer.
The project type is fixed once a project is created, so it is worth deciding deliberately. Viewer, Configurator and Modular each suit a different kind of product.
Yes, and we recommend it. Launch a core configurator, see how customers use it, then add integration, accounts, AR or additional products based on what you learn.
The AI assistant can audit option coverage and conditional logic, and the MCP server lets an agent evaluate logic against real projects with a scoped token — which is how large catalogues stay consistent without manual checking.
Structure, UV mapping, optimisation and pivots — the preparation that determines whether the rest goes smoothly.
Eight case studies covering requirements, solutions and what was actually delivered, from 2018 onwards.
Bezit een 3D-productconfigurator om verkopen te stimuleren en direct vanuit uw website offertes te genereren
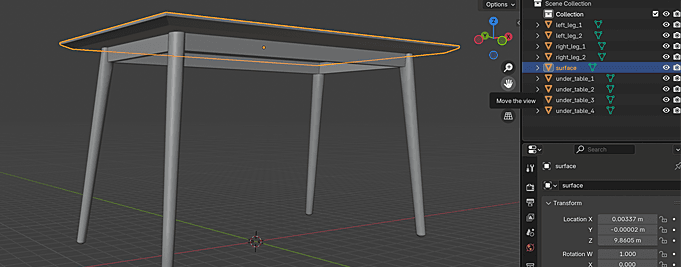
How to prepare 3D models for a configurator: naming and separating parts, square UV mapping for uploads and engraving, polygon optimisation and correct pivots.